Anthony Cecchini is the President of Information Technology Partners (ITP), an SAP consulting company headquartered in Pennsylvania. ITP offers comprehensive planning, resource allocation, implementation, upgrade, and training assistance to companies. Anthony has over 17 years of experience in SAP R/3 business process analysis and SAP systems integration. His areas of expertise include SAP NetWeaver integration; ALE development; RFC, BAPI, IDoc, Dialog, and Web Dynpro development; and customized Workflow development. You can reach him at [email protected].
The SAP IDoc Technology
In this month we will continue our look at SAP IDocs and the IDoc Technology by exploring how we can use the new custom IDoc extension we created in the last blog. If you need a refresher on how to extend an IDoc CLICK HERE
Create an IDoc Message Type
The message type determines the technical structure of the message, along with the data contained. Through configuration it will also determine the process flow involved in a “Distributed environment”. The Message Type controls Process Code, which in turn drives a Function Module to derive the content of the message in an OUTBOUND scenario or execute the desired SAP process in an INBOUND scenario. Finally, it also controls how the IDocs will be processed (batch, immediately etc). The former is accomplished in conjunction with Partner Profile configuration which we will discuss later in the blog.
For starters – there exist many delivered standard IDoc message types predefined by SAP. Here are a few of them as an example……
SAP Object IDoc Message Type
CUSTOMER DEBMAS
VENDOR CREMAS
MATERIAL MATMAS
SALES ORDER ORDRSP
PURCHASE ORDER ORDERS
INVOICE INVOIC
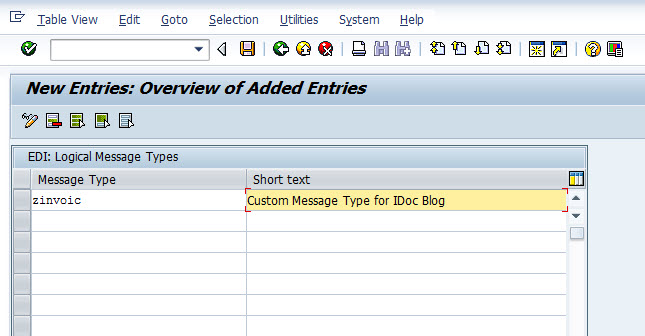
We can also create a customized logical message type according to our specifc requirements. Since we are using the invoice here we could use the existing message type INVOIC, but I want to show you how to create your own logical message type, so we will create a custom one. We will use ZINVOIC as our custom message type.
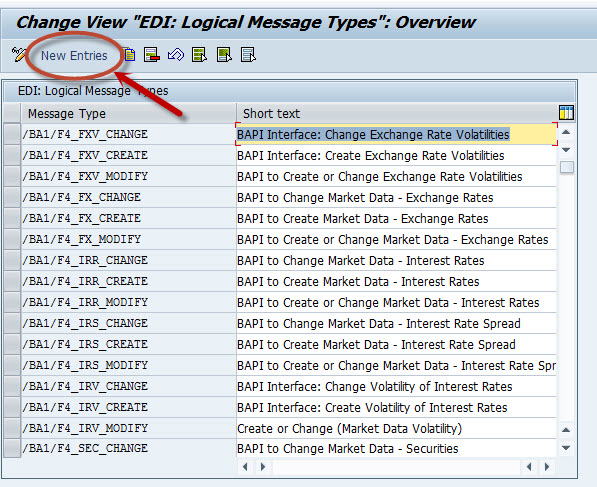
Create a new Custom IDoc Message Type using transaction WE81
Execute transaction WE81. Enter into Change mode by clicking the ![]() button. Hit New Entries as shown in the screen below.
button. Hit New Entries as shown in the screen below.
You will then be able to enter our NEW Custom Message Type along with a description and hit SAVE . See below…
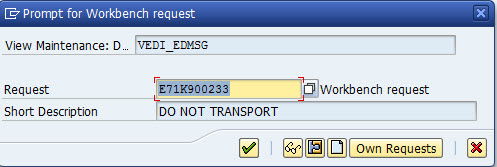
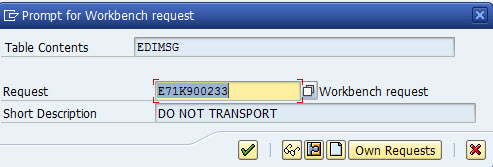
When you hit SAVE, you will be prompted by SAP to create a transport. For our purposes I am creating a transport with the text “DO NOT TRANSPORT” as this is for education purposes and there is no real requirement behind this.
That is it! We have created a custom IDoc Message type. Now we have to link this new message type to our IDoc Extension we created earlier.
Create a New IDoc Assignment using transaction WE82
In order to use the new IDoc extension we created, we need to assign or link the Custom Message type to it. In order to this we use transaction WE82. Lets look at the screen below. Enter into Change mode by clicking the ![]() button. Hit New Entries.
button. Hit New Entries.
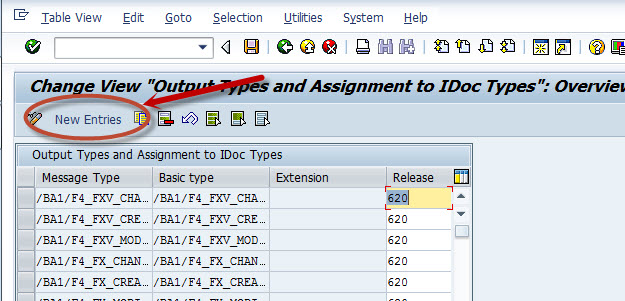
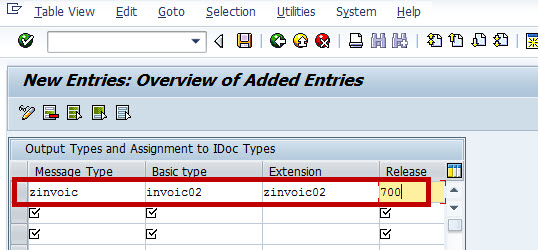
Next we enter in the information. So we enter our custom Message type ZINVOIC, the Basic IDoc (delivered or IDoc Type we extended) INVOIC02 and our Extension ZINVOIC02. For release I put 700, but for you, please enter your ABAP AS release.
Hit the Save Button and you’ll be prompted again to use the Transport we created previously. Go ahead an use it.
Create an IDoc Entry for the Partner Profile using transaction WE20
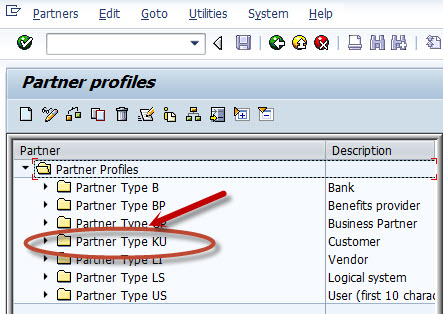
The next step in configuring this IDoc Interface would be to create an entry in the Partner Profile using transaction WE20. Lets take a look at the transaction. Please note this will be an Outbound Invoice, so our partner could be a Customer, but will likely be the Middleware your company is using such as PI (Process Integration, formerly know as XI ). We will choose an XI Partner. Expand the tree for Customer (see bellow)
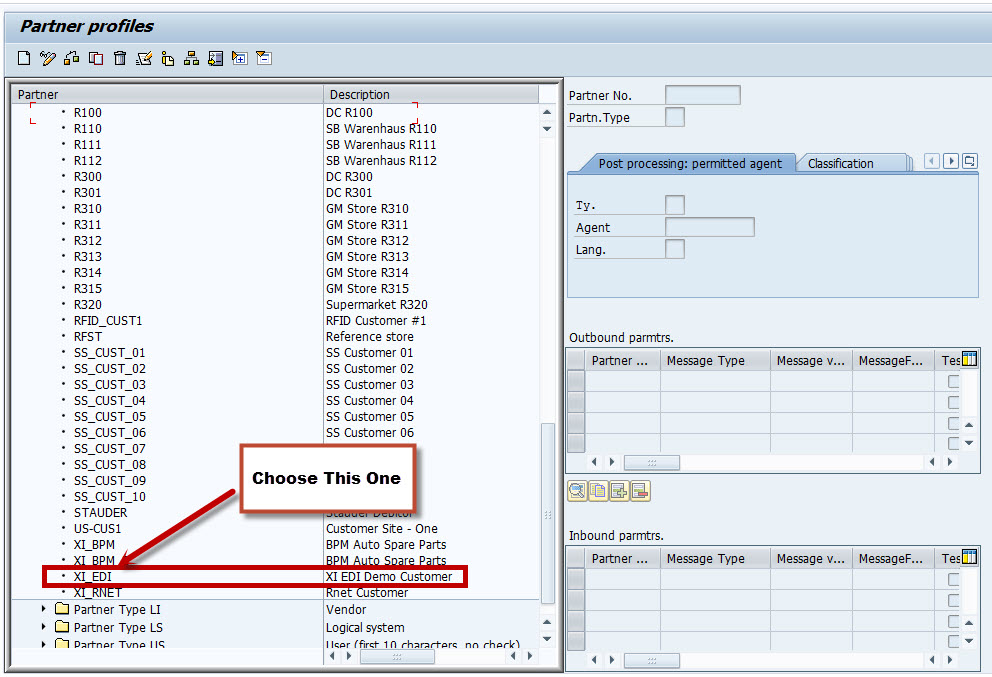
We will Choose the XI_EDI Customer for this Blog.
Next, we need to click on the  to create a new entry. Again,since this is an outbound Interface, we need to be working in the “OUTBOUND PARAMETERS” section shown below. Take note there is already an entry for ORDRSP (Order Response), this is one of the delivered Message Types we discussed at the beginning of this Blog.
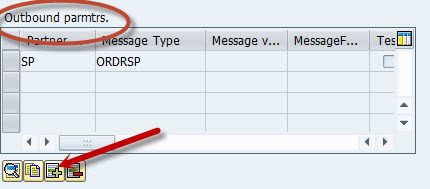
Lets add our Entry… and take a look at each of the areas noted in the screen shot in turn.
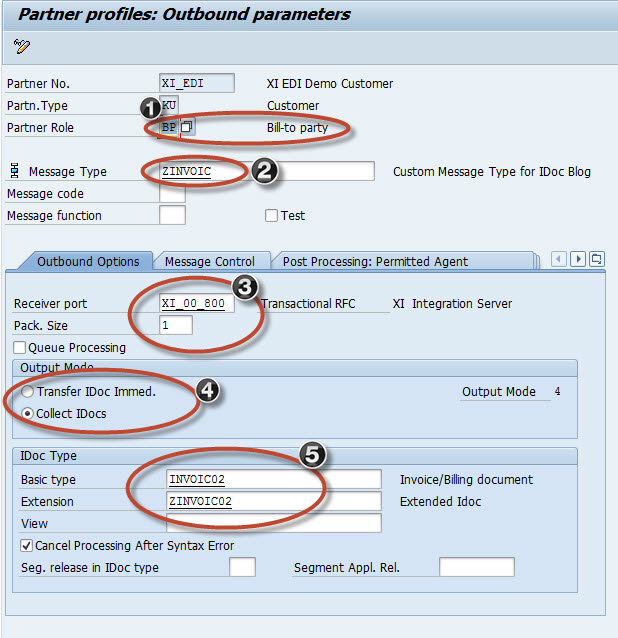
First, take a look at #1. You will notice we used a Partner Type of BP. This is the Bill-To Pary and makes sense as this is an Invoice.
Next, #2 is the Custom Message type we created. Note the description to the right of the entry.
Next, #3 is the Receiver Port and Package size. The Port Specifies how the IDocs are transferred. There are various technical possibilities for this communication known as port types. While the Package size describes the number of IDocs to send in one package or call to the Middleware.
Next #4 is used to either send the IDoc immediately (Real -Time) or to collect them and use a batch job (RSEOUT00) to send at a defined interval (Near Real – Time).
Finally #5 shows the delivered Basic IDoc and our Extension that has the new Fields.
IDoc Processing and Message Control
To complete this outbound Entry it will be necessary to fill in the Message Control Tab. While it is not my intent to teach this subject in this blog, a rudimentary understanding will be necessary.
What is Message Control ?
Message control is a mechanism in which you can trigger the outputs based on certain conditions . As SAP puts it is is “The output or follow up processing of partner-dependent messages is automated via Message Control. The application then calls Message Control via the specified interfaces.” There can be different forms of output like Workflow, print output, IDoc dispatch or even a fax. This is normally configured for the transactional data being entered and requirement being addressed.
SD and MM applications use message control for the message output. Message control is also referred as Output control.
Follow the link Message Control Explained for a detailed information on Message Control including how to configure it.
OK, lets end this month’s blog by adding the details of the Message Control Tab and save our entry. Take a look at the screen below
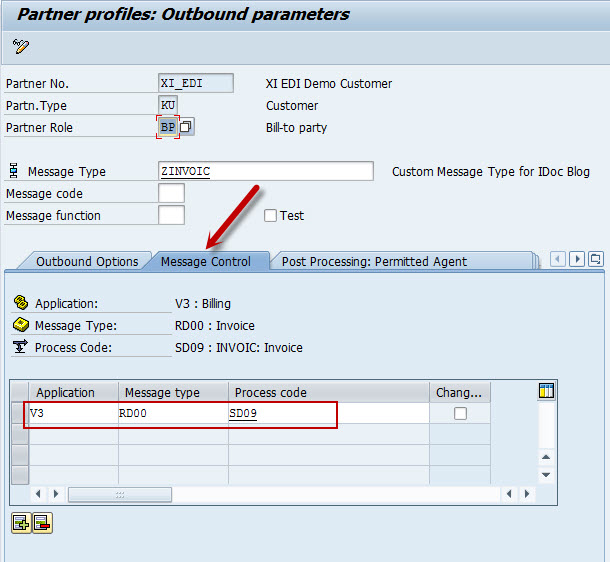
These three key fields – Application, Message type and Process Code assigned in the message control tab together uniquely identify a message type which uniquely identifies an IDoc type.
Application: The Application specified in message control determines the output type and uniquely identifies a message type which can be assigned uniquely to an IDoc type. For Example: ‘EA’ is used for ‘Purchasing RFQ’ in Materials Management (MM) and V3′ is used for ‘Billing’ in Sales and Distribution (SD).
Message type: Message type along with the application uniquely identifies a message type which can be assigned uniquely to an IDoc type.
For Example: ‘LAVA’ = ‘Shipping notification’ in dispatch (application ‘V2’).
Process code: The Process code is used by an IDoc Interface to determine the application Function Module which converts the SAP document into an IDoc.For Example: ME10: Purchase order (MM)
Here are the values we have chosen:
The application is V3: Billing
The Message type RD00: Invoice
The process code SD09: INVOIC: Invoice
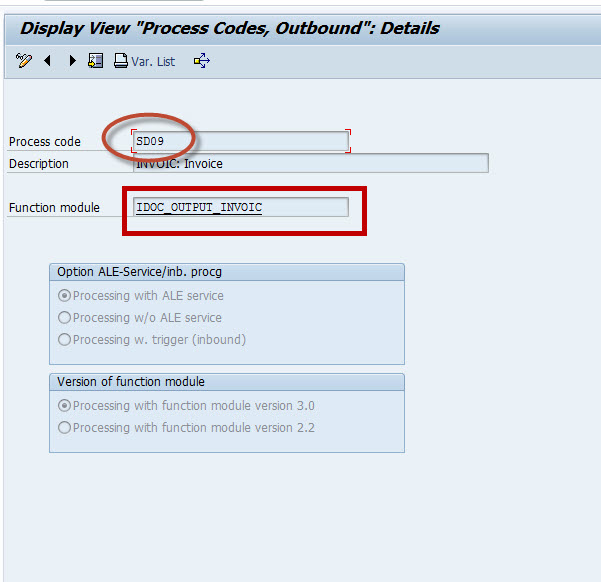
The function module which is embedded in each process code follows a naming convention “IDOC_<OUTPUT / INPUT >_NAME OF MESSAGE TYPE”. For our example the delivered Message Type for an Invoice is INVOIC and this is an Outbound scenario, so the function module will be “IDOC_OUTPUT_INVOIC”. (If this was a completely “Brand New” interface and not an Extension, we would need to create and configure our on function module. This is outside the scope of this blog.)
Lets double click on the Process Code in this screen to see the configured Function Module we will be using.

We would then be taken to Transaction WE41.
Summary
So in summary, we needed to create a New Message Type ZINVOIC. We then assigned our IDoc Extension to the new Message Type. We configured the Partner Profile to use our new IDoc Extension. We also touched on Message Control for Outbound IDoc scenarios.
To read the part 1 of the Blog click HERE
To read the part 2 of the Blog click HERE
To read the part 3 of the Blog click HERE
In the final part of this blog series we will take a look at how find an EXIT or Enhancement to populate the data in the new fields of our IDoc Extension.